With Last Earth Day, you can be thinking about how to make changes in the position of the Earth. Generating green starts at home, and it doesn’t have to be expensive or exhausting. Any number of green DIY projects allows you to be creative and do something useful for you and the planet.
Here are six DIY projects for your home and garden that we collect around the web. Whether you prefer a simple or something more complex project, there is something for you, from keeping your home clean to recycling plastic for your neighborhood or community.
We recommend following links to each of the projects, whose creators have tried and perfect to share with the world. Be sure to send you congratulations when you have finished with your green DIY projects.
Reusable cleaning towels
Do you still trust a single -use wipes to clean daily disorder? Made of synthetic fibers and that often contain chemicals such as whitening, those wet wip cannot be recycled or composted. So we throw them in the trash and end in the local landfill, or worse, dirty the landscape. The pins and the delay have a quick and easy DIY recipe to make reusable cleaning wipes. They are as convenient as the disposable wipes of only one use, but are reusable, ecological, do not contain harmful chemicals and are cheaper than buying those disposable wipes.

Althegh, these wipes are made of microfiber fabric, you can remove them from any washable fabric, such as old towels or stained kitchen towels. What especially of this project is the instructions on how to fold the wipes so that the next one is available to extract from the container when necessary.
Ingredients for cleaner
- 1 1/2 hot water cups
- 1/2 Teapoon Borax – To kill bacteria
- 1 bicarbonate of sodium bicarbonate – to dissolve dirt and dirt
- 3 tablespoons of alcohol rubbing – to disinfect
- 5-10 drops of essential oils (optional) -For fragrance
You will also need
- Microfiber fabrics
- Plastic container with member: To adapt to your folded wipes
- Knife or scissors: To cut the member of the plastic container to facilitate access
The steps
First, double the fabrics to dispense like Kleenex. To do so, place the first fabric floor, place the second superimposed half fabric and fold the first fabric. Now, place the third fabric, half of the overlap and bend the second fabric. Repeat this pattern until each cloth is bent. Put them in the plastic container and cut a small opening in the member to remove the wipes. Pins and delay have a useful video that guides it through this process.
To make the cleaning solution:
- Combine the borax, sodium bicarbonate and hot water. Stir until the borax and sodium bicarbonate dissolve.
- Add 3 tablespoons or with alcohol and 5-10 essential drops or oils (try orange, grapefruit, lavender, tea tree or mint).
- Pour the cleaning solution on the reusable wipes in their plastic container so that they are ready to use.
When you need a wipe, take it out, clean and simply take it in the laundry basket. Once you have used all the wipes, wash them and dry, fold again in the plastic box and pour the cleaning solution. Thank you, pins and procrastination!
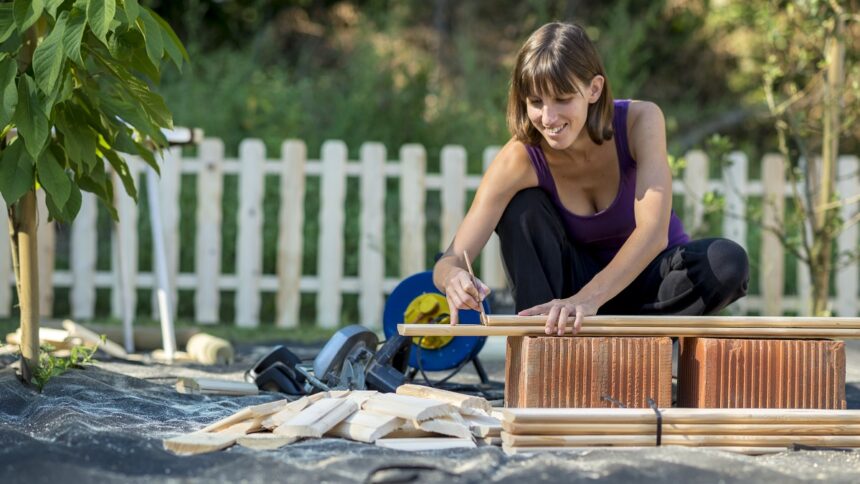
High bed garden
Starting your gardening trip can be exciting but also full of obstacles. What happens if your soil is not up to your favorite fruits and vegetables? What happens if your drainage system is not effective? What happens if you don’t have enough space for a garden? Establishing a high bed garden can solve all thesis problems.

James Prigioni, from the gardening channel, offers a video that does a quick job to build a bed garden high at an affordable cost. Its elevated bed can be or any size and dimensions, but a 4 feet bed per 8 feet is the most common.
What you will need
- Two 2 “x 12” tables (8 feet long)
- Two planks of 2 “x 12” (4 feet long)
- 12 2 -foot long reinforcement pieces
- Cardboard or newspaper
- A rubber deck
- Soil to fill the frame
The steps
Once you have all the materials, follow these tips to build the high bed for your garden.
- Place their tables by placing them with their inner corners with touch. Support each side table using reinforcement bars. If you don’t have reinforcement bars, you can wear 3 -inch cover screws to join all boards. You have made your bed, now you have to prepare it.
- Final the bottom with cardboard or newspaper and take it with the ground.
Your high bed is ready. Now you can start planting your garden. We thank James Prigioni for sharing a great idea.
Compost container
Have you started composing at home? The compost of your backyard is one of the best ways to feed your garden. The pile of dried leaves, the patio ornaments and the leftovers of the kitchen can act as a natural fertilizer and promote the growth of their garden. But the pile is not attractive, so you will probably want a container that hides your rear patio compost pile.
This old house has a plan and instructions to make an attractive compost container that will never be referred to by the guests as “that pile in their backyard.”

While there are numerous profitable compost containers made of available recycled materials, you can save money by making your compost container. We recommend that you use rot resistant cedar.
What you will need
- Cedar wood
- 2 -inch edging head screws
- Wood glue
The steps
Follow these steps to build your Cedro compost container.
- Cut 24 horizontal wood slats of 1 “x 4”, eight vertical legs, eight slats and slats for the member, and an “x 4” to match the height of the container, that is your spacer.
- Build the back and the sides by placing six ribbons ¾ inches to each other.
- Build the lower and upper panels by placing three ribbons to ¾ inches with each other.
- Use wood glue and head screws to assemble the container.
- Make and attach to the member.
Your DIY compost container is ready. We always have this old house to get great ideas.
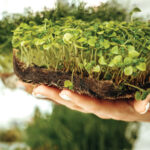
Vertical garden with drip irrigation system
If you are passionate about gardening but in the lack of space, a vertical garden can be a great option. It is efficient in space and requires minimal water and electricity. Houseful or Handmade has an easy vertical garden project to continue with a drip irrigation system that will make it grow vegetables and herbs in a short time.

What you will need
- Tables
- 2 sides: 3/4 ″ x 7 1/4 ″ x 50 ″
- 6 shelves: 3/4 ″ x 7 1/4 ″ x 32 ″
- 1 Base Front: 3/4 ″ x 5 1/2 ″ x 35 ″
- 2 base sides: 3/4 ″ x 5 1/2 ″ x 8 1/2 ″
- 9 Back: 1/2 ″ x 5 1/2 ″ x 33 1/2 ″
- Landscaping fabric
- Outdoor wood glue
The steps
- Start by preparing the wood and garden shelf (see the complete instructions here).
- Then configure the wall and place the landscaping fabric.
- Once the structure is ready, you can place on the floor and start planting.
You will need additional supplies and instructions to install the drip irrigation system. Visit the house or handmade for more details.
Precious plastic recycling system
Have you ever thought or starting your own local plastic recycling business? Now you can. The full configuration will cost several thousand dollars, but you can start with a part of the precious plastic system and work with the success of end -to -end plastic recycling.
While configuring a recycling system is a bit more complex than other projects on this list, it could be a local business and generate income from it.
Here is a video that explains the systems and starting.
https://www.youtube.com/watch?v=76afnixyjue
What you will need
To start, you will need four machines that can be combined to crush, extride, heat and make plastic items with its recycled plastic. There are videos to accompany each of the projects:
- Shredder – Cut plastic items into smaller flakes (instructions)
- Extrusion – Convert plastic flakes into a plastic line (instructions)
- Injection – To heat the plastic flakes and inject them into a mill (instructions)
- Compression – To heat the plastic and press it in a mold (instructions)
You can buy completely assembled thesis machines or build them yourself. According to our experience with them, it is worth assembling or working with a local precious plastic enthusiast because these machines will need repairs.
Once you have the desired machines, you can start collecting plastic from your area. Once you start using crushing and extrusion systems, you can claim plastic granules that you can sell to local companies. Alternatively, you can reuse plastic to make products using injection and compression systems.
Non -toxic wood flood cleaners
Maybe starting a business is not your idea of fun. If you are looking for a project around the house, consider the recipe for breeding nature for a homemade wooden cleaner without stripes using non -toxic and environmentally benign materials.
The problem with most cleaning products is that they consist of inorganic chemicals such as ethoxy alcohol and artificial fragrances. These chemicals can cause health problems, including cancer and allergies, and if they enter the local water supply, they can damage aquatic life.

What you will need
- 1 cup of distilled water
- ½ cup of vinegar
- 2 to 3 drops or soap for dishes
- ½ cup isopropyl alcohol
- 25 to 30 drops essential oil (try 7 lavender drops, 7 drops of orange or lemon, 10 drops of tea tree oil and 5 mint drops)
The steps
- Add all the ingredients to a spray bottle and shake them vigorously until you get a transparent solution.
- Sweep or aspire the floor to eliminate lost crumbs.
- Sprinkle the cleaning mixture on the floor.
- Take it with a microfiber cloth.
You can use this cleaner solution to clean almost anything, including floors, steel, glass, porcelain and potters. Do not use it in any natural stone or porous surface, since acid in vinegar can damage it.
Ready to start?
We hope you enjoy these green DIY projects for your home and garden. It is satisfactory to work on small ecological projects that eliminate the use of toxins and add a touch of nature to their home. And there is no better way to break the pandemic blues than ending a project and enjoying the results. It can have a positive impact on the environment and live a healthier life with each small change.
Editor’s note: This publication was originally published on April 15, 2021 and was updated in April 2025.